Learn how to use machine learning program Wekinator and openFrameworks to create a continuous color controller.
In this tutorial, we are going to create a continuous color control in processing using the input from openFrameworks while using Wekinator software to train the data.
By creating a slider in openFrameworks, we can send the x and y values to Wekinator through the OSC communication. Wekinator will receive these values and will become trained accordingly. Wekinator will then send the output to the processing where the color of the output window will be changed.
Setting up openFrameworks
On the openFrameworks side, there are three files necessary for sending and receiving the data from Wekinator.
Main.cpp
Main.cpp runs the app and opens up the output window.
#include "ofMain.h"
#include "ofApp.h"

//========================================================================
int main() {
	ofSetupOpenGL(600, 480, OF_WINDOW);
	// <-------- setup the GL context
	// this kicks off the running of my app
	// can be OF_WINDOW or OF_FULLSCREEN
	// pass in width and height too:
	ofRunApp(new ofApp());
}
OfApp.cpp
This is the code necessary for the OSC communication between openFrameworks and Wekinator.
#include "ofApp.h"
#include "ofxOsc.h"


//--------------------------------------------------------------
void ofApp::setup() {
	sender.setup(HOST, SENDPORT);
	ofSetFrameRate(60);
}

//--------------------------------------------------------------
void ofApp::update() {
	// Sending data to the wekinator
	ofxOscMessage m;
	m.setAddress(string(SENDMESSAGE));
	m.addFloatArg((float)mouseX);
	m.addFloatArg((float)mouseY);
	sender.sendMessage(m, false);
}

//--------------------------------------------------------------
void ofApp::draw() {
	ofSetColor(255, 0, 0);
	string buf = "Sending message " + string(SENDMESSAGE) + " to " + string(HOST) + " on port " + ofToString(SENDPORT);
ofDrawBitmapString(buf, 10, 20);

	buf = "X=" + ofToString(mouseX) + ", Y=" + ofToString(mouseY);
	ofDrawBitmapString(buf, 10, 50);

	ofSetColor(0, 255, 0);
	ofDrawRectangle(mouseX, mouseY, boxSize, boxSize);
}

//--------------------------------------------------------------
void ofApp::mouseDragged(int x, int y, int button) {
	mouseX = x;
	mouseY = y;
}
In the setup function, set up the sender to connect to the Wekinator port and send data there. The port number where Wekinator is listening is 6448 and host address is ‘127.0.0.1’
In the update function, send the x and y values of the slider to Wekinator.
In the draw function, make a slider that will move upon dragging it around.
OfApp.h
This is the header file.
#pragma once

#include "ofMain.h"
#include "ofxOsc.h"

//Defaults for OSC:
#define HOST "127.0.0.1"
#define SENDPORT 6448
#define SENDMESSAGE "/wek/inputs"

class ofApp : public ofBaseApp {

public:
	void setup();
	void update();
	void draw();

	void mouseDragged(int x, int y, int button);

	ofxOscSender sender;

	int mouseX = 0;
	int mouseY = 0;
	int boxSize = 30;
};
How to Run the openFrameworks Sketch
Create a new project using the project generator for openFrameworks. The Ofxosc addon is required for this project.
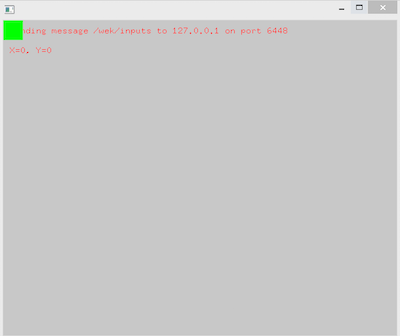
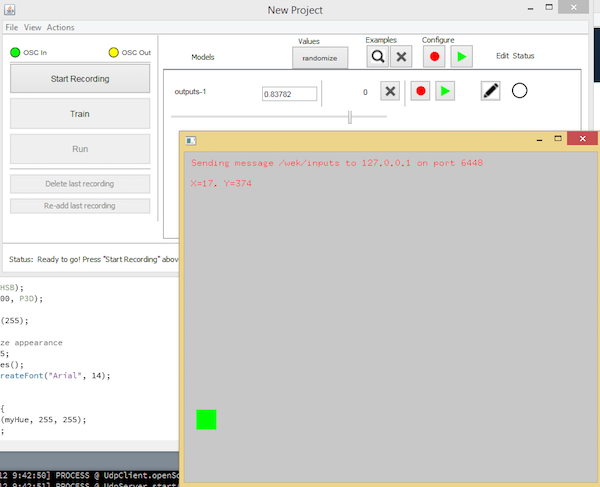
Copy the codes given above to the respective files and build the project. After building the project, it will show you the output window like this:
Utilizing the Processing Sketch for Receiving Outputs
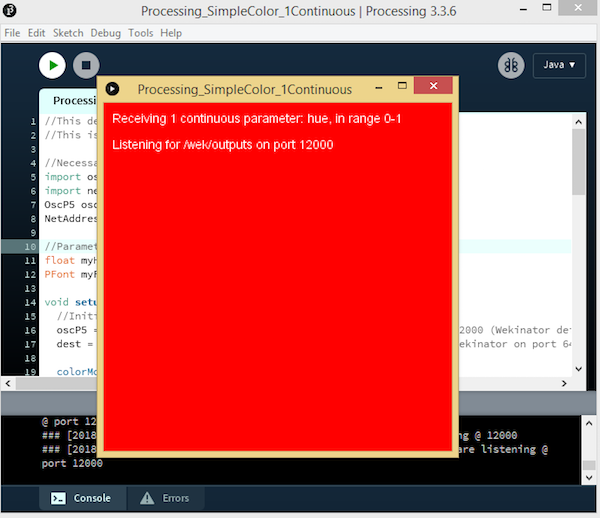
On the output side, we have a processing sketch to receive the output from Wekinator and will change the background color of the output window. The sketch will receive 1 continuous output from Wekinator.
This sketch is available from Wekinator's examples page.
Download the sketch titled ‘Simple Continuous Color Control' from there. Unzip it and run the sketch in processing. The processing window looks like this:
Setting up Wekinator
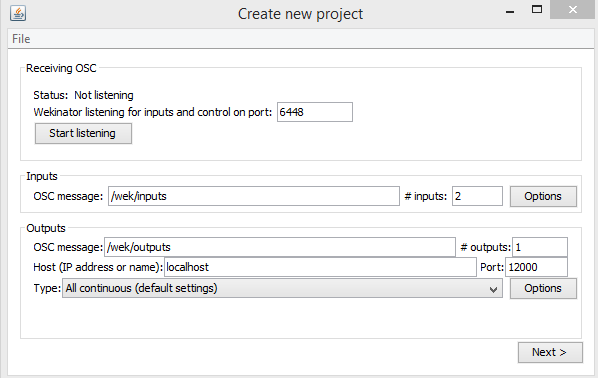
Open Wekinator and make the settings as shown in the figure below.
The create new project window in Wekinator.
Set the inputs to 2 and the outputs to 1. Select the output type to “all continuous”. Wekinator will send 1 continuous output of any value from 0 to 1 to processing.
Now click "Next" and it will take you to a window like the one shown below.
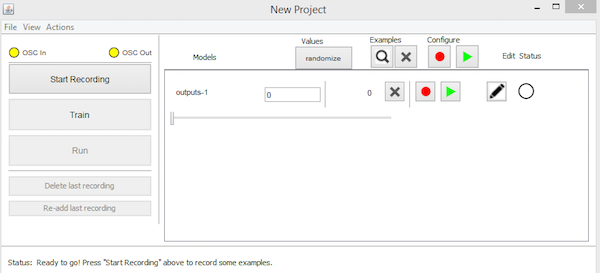
The new project window in Wekinator.
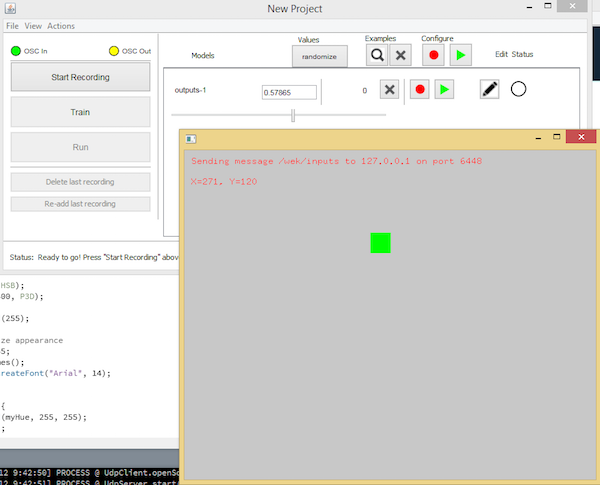
Now drag the green box in the processing window to any place and click "Randomize." Start the recording for a second and it will record some samples.
Drag the green box to another place in the processing window and click on "Randomize" again. Start the recording for a second to record more samples.
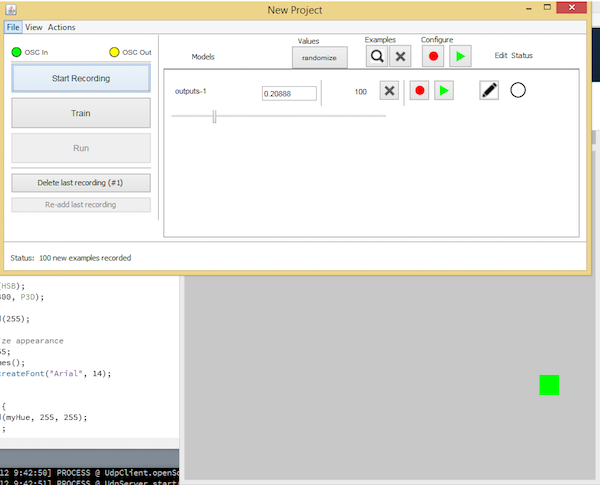
Drag the green box to any other place in the processing window and click on randomize for the third time. Start the recording for a second to record more samples.
Now click on "Train" and then click "Run." Dragging the slider in the openFrameworks window will change the background color of the processing window.
Check out the video below to see how the finished product works!