In this video write-up, see how you can create a stylish Arduino-based USB volume knob for your desk.
Many of you have found yourself with this problem: some keyboards have annoying media-keys with complicated combinations for lowering and raising the volume. Let's build a stylish and intuitive alternative: the USB volume knob.
The Electronics Behind the Build
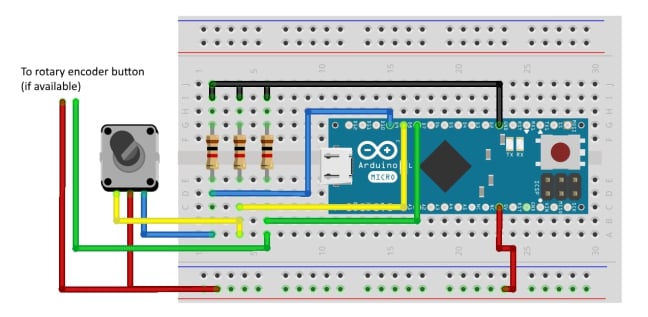
This project is great because the build is quite simple while the end result is very aesthetically pleasing. You only need a few components to build it.
The main work will be done by an Arduino Pro Micro. Make sure to get the original one with an Atmel ATmega32U4 microcontroller, because others might not be able to communicate via USB! Other than that you’ll need a rotary encoder and three pull-down resistors:
The Firmware
Most of the work is done by the software. It is responsible for reading the encoder’s state and telling the PC to lower and raise the volume or to pause and resume playback.
In order to allow communication between the volume knob and a PC, you’ll need to download the nicohood HID library. Download it as a ZIP-archive and put it in the Arduino IDE’s libraries folder. From there, download the firmware and upload it to your Arduino.
Designing the 3D-Printed Case
The case for this project is made up of three individual parts that have to be 3D printed. I used Tinkercad to create this design.
The design files are available for download at the end of the article.
The volume knob case design in Tinkercad.
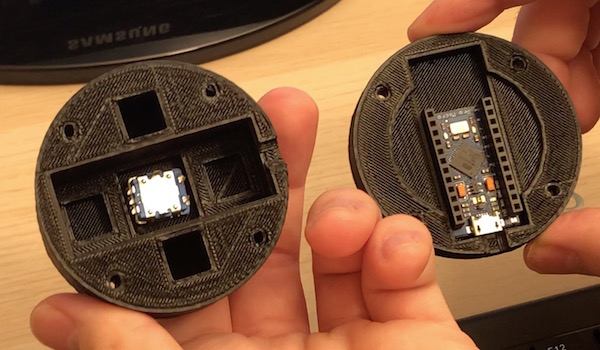
After printing the case you can test fit the Arduino and the encoder to make sure that everything was manufactured correctly:
Placing the electronics build into the 3D-printed case.
A quick design note:
You might notice that the case design looks a bit different compared to the printed parts. After using the volume knob for several hours a day for two weeks I noticed that the Arduino got quite warm. I added a few cutouts to the case to allow the air to circulate and keep the Arduino cool.
Final Assembly
After building the circuit and printing the case you simply need to put the two parts together. The centerpiece houses the rotary encoder and the self-made circuit. The bottom piece holds the Arduino in place. After putting everything into the case, close it up with four screws and nuts.
Final Thoughts
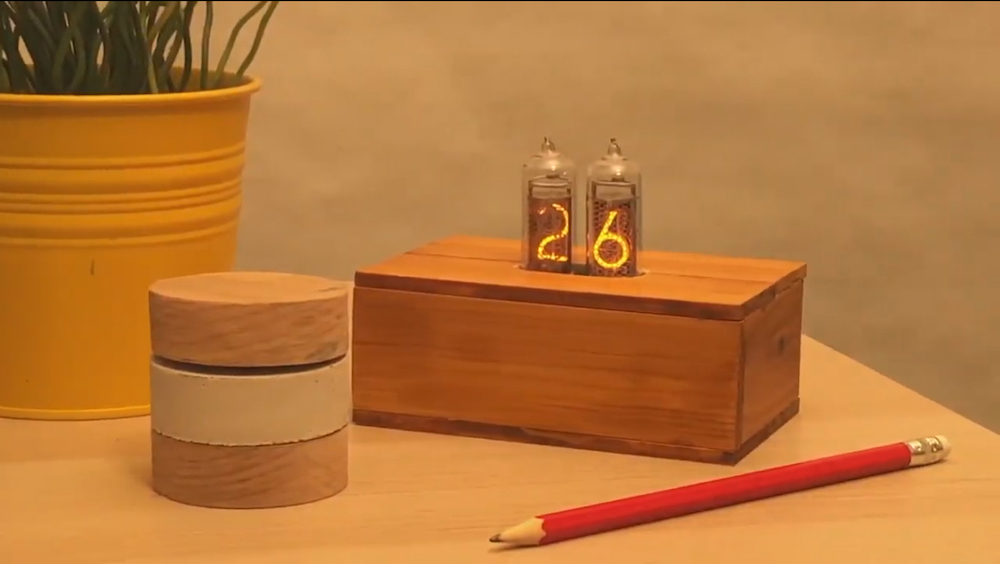
This is a really cool project for everyone who loves listening to music on their computer and it also makes for a great gift! If you don’t want the case to be made out of plastic, you can also use different materials, as shown in the featured image.