Scratch 3 is available for Raspberry Pi 4 and, for the first time, can be used offline!
Scratch 3 is a great way to teach young students the basics of programming in a fun way. And thanks to the increased processing power of the new Raspberry Pi 4, you can now use this wonderful tool offline. This article will take you through all the steps that are necessary to install the development environment onto your Pi 4.
Scratch 3 Supported Raspberry Pi Models
Before you get started, make sure you’re using one of the following Raspberry Pi models:
- Raspberry Pi 4 (1, 2, or 4 GB of RAM)
- Raspberry Pi 2
- Raspberry Pi 3 or 3+
Scratch 3 will work on any of these devices. However, it’s recommended that you use a Raspberry Pi 4 with at least two gigabytes of RAM. I tested the application with both the recommended model as well as an older Pi 2, and I can confirm that it doesn’t run smoothly on an older system.
Please note, that Scratch 3 requires you to use the newest version of Raspbian to run. At the time this article was written the newest version was Raspbian Buster.
Create a Bootable SD Card for Your Pi 4
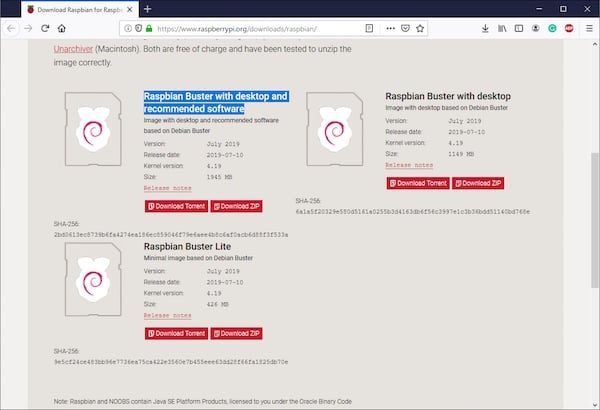
If your Raspberry Pi didn’t come with a preconfigured SD card, you’ll need to create a bootable one. For that purpose, navigate to the Raspbian download page and scroll down until you see the different versions:
Access the Raspbian download page and scroll down until you see the different versions.
Make sure that you select the package that includes the desktop environment as well as the recommended software. While it’s possible to download the lite version and install the desktop and necessary software manually, I don’t recommend that method to beginners.
If you already have an SD card with an older version of Raspbian I still recommend that you flash a new memory card to make sure that everything works as intended.
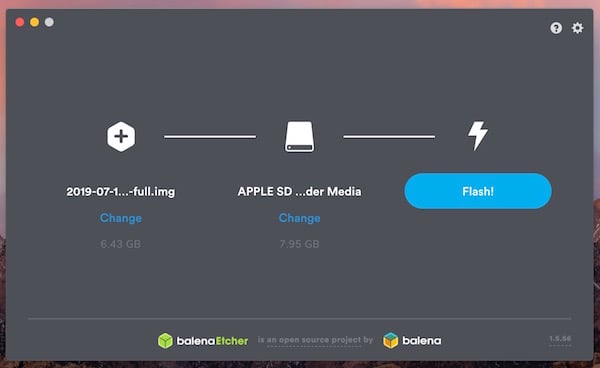
Once the download finishes, use the balena etcher to transfer the files to the SD card. In the etcher application, select the image file and your SD card:
Use the balena etcher to transfer the files to the SD card.
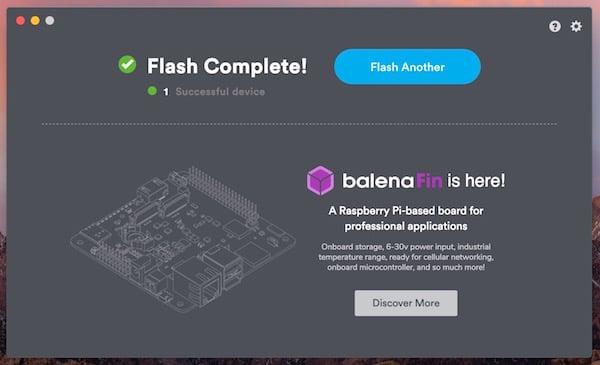
After a few minutes, the process should be done and you can remove the memory card:
You'll see this screen when the flash successfully completes.
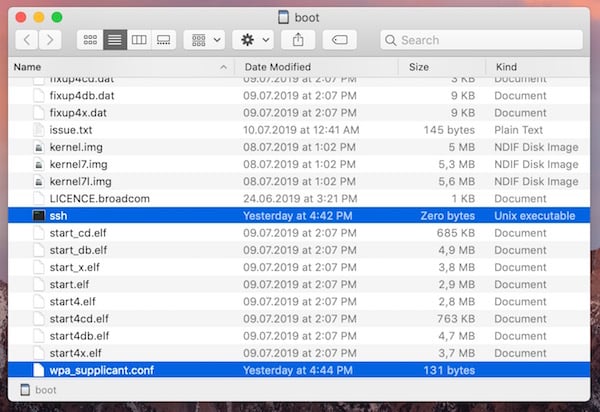
Add an SSH file to set up a Wi-Fi connection.
Installing Scratch 3 on Pi 4
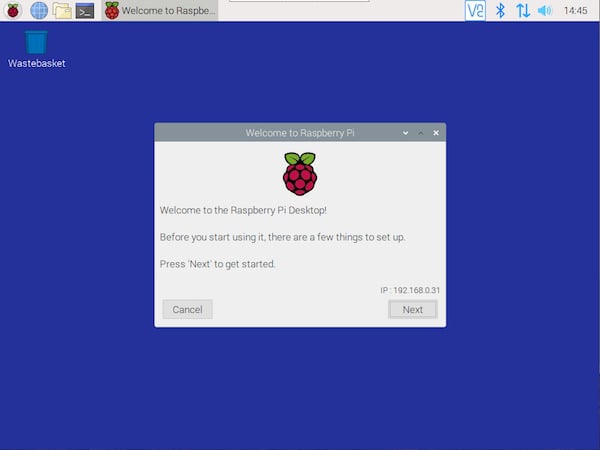
When you boot the Raspberry Pi, it should go straight to the desktop and greet you with a quick setup dialog:
Raspberry Pi Desktop's welcome screen.
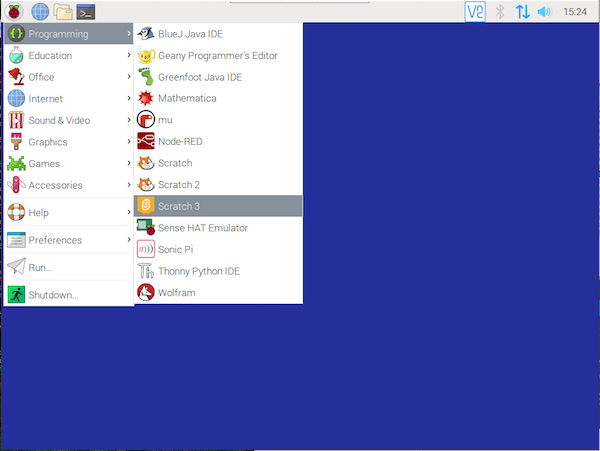
You can skip it for now and it’ll reappear when you reboot the system later. To install Scratch 3, navigate to “Preferences” and then choose “Add/Remove Software”:
To install Scratch 3, go to “Preferences” and then choose “Add/Remove Software”.
Once a new window opens, search for “Scratch”:
Find Scratch in add/remove software.
Tick the box next to the marked package and hit “OK”. Alternatively, you can also use the command line to install scratch by typing:
sudo apt-get install scratch3
The app will then be installed and you can run in from the start menu:
Run Scratch from the Start menu.
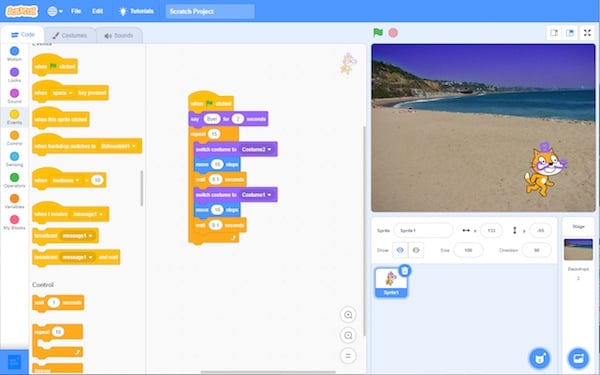
Using Scratch 3's Desktop Version
This version of Scratch works exactly the same as the online tool. However, it supports the use of the Raspberry Pi’s GPIO pins and you don’t have to be online to use it.
You can choose a block from the left side of the window and drag it to the center area. Once you’re done, you can execute the sequence by clicking the green flag icon:
Click the green flag icon to run Scratch 3's desktop version.
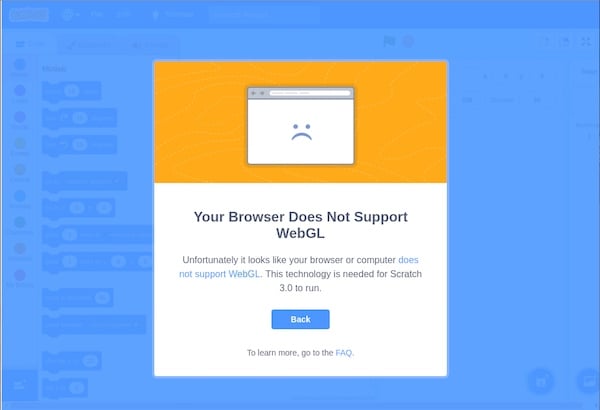
Error Running Scratch 3 With a VNC Server
The only problem that I had with this version of Scratch 3 occurred when I tried to use it in conjunction with a VNC server. Whenever I tried to run it that way, I received the following error message:
The error message I received when trying to run Scratch 3 with a VNC server.
This bug didn’t occur when the Raspberry Pi was directly connected to a monitor via its HDMI output or when using the regular Scratch 3 online version.
Scratch 3 Runs Best With the Pi 4
The desktop version of Scratch 3 works perfectly fine on the newest Raspberry Pi. However, I cannot recommend using an older model because they’re way too slow to handle the app (Scratch 3 confirms this as well).
I had problems running the app together with a VNC server but it worked just fine when the Pi was directly connected to a monitor. Interestingly, the online version doesn’t seem to have that problem. So if you run into this error and you have an Internet connection you can always use the online version instead.