Learn more advanced features and shortcuts in 3D design program Tinkercad to make designing quicker and easier.
In this article, I want to introduce you to the more advanced features in Tinkercad and I also want to give you some tips and tricks on how you can create good designs in a shorter amount of time. I recommend that you get familiar with Tinkercad before reading through this article.
Shortcuts for Faster Editing
Let’s quickly go over the shortcuts for the most important features:
- Ctrl + C, Ctrl + V Copy and paste
- Ctrl + Z, Ctrl + Y Undo and redo your last step(s)
- Ctrl + D Duplicate the selected object(s)
- Ctrl + H Hide the selected object(s)
- Ctrl + Shift + H Show all hidden objects
- Ctrl + G Group the selected objects into one shape
- Ctrl + Shift + G Separate a shape into the single objects
- L Opens the align tool
- M Takes you to the mirror tool
The Difference Between Copy-Paste and Duplicate
You might have noticed the two different functions for creating copies of a shape. The main difference between the two functions is how they handle transformations:
If you copy an object (Ctrl + C) and then paste it (Ctrl + V), the transformation of the copied object is not applied to the new object.
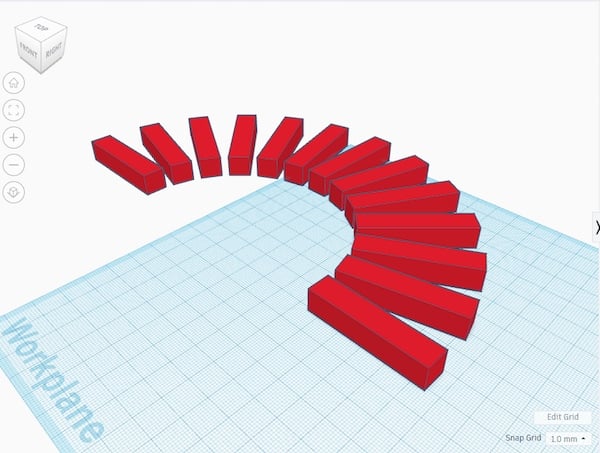
However, if you duplicate an object, then rotate the new shape by ten degrees and repeat the duplication a few times, all the new copies will also be rotated by 10 degrees. Here's an example:
When you duplicate an object, the duplicated object rotates by 10 degrees.
This works with the basic transformations (translation, rotation, and scale) and a combination of them. Once you deselect the duplicated object, the transformation information discarded.
How to Move the Workplane
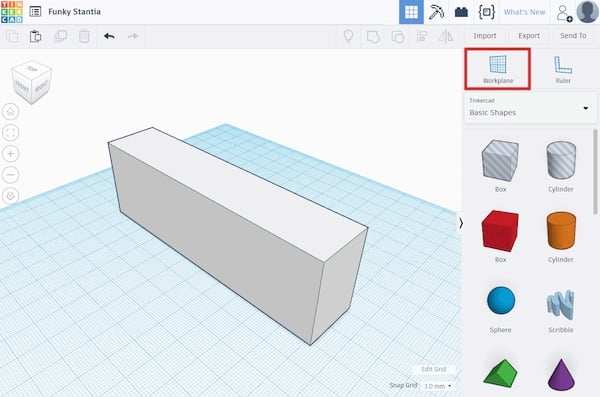
The main working area can be moved to any surface in your design. To do that, click the “Workplane” button on the right side of the screen, right above the “Basic Shapes” panel:
You can move the working area to any part of your project.
This will bring up an orange rectangle that will follow your mouse. Click on any surface to place the new workplane. To remove the second working area, click anywhere outside of a shape.
Placing a new workplane will allow you to quickly add objects that are aligned to a surface of a shape:
Placing a new workplane allows you to quickly add aligned objects.
How to Change the Grid
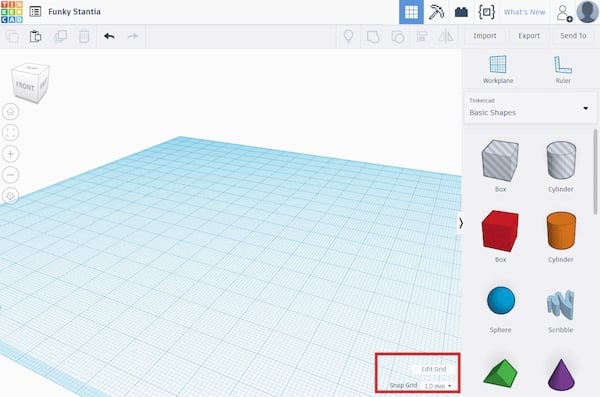
The workplane’s settings can be changed by clicking the “Edit Grid” button in the bottom-right corner of the working area:
You can change the workplane's settings with the "Edit Grid" button.
This will bring up a pop-up window which allows you to change the units and to edit the workplane’s size.
Additionally, you can choose from a set of presets which will change the workplane’s dimensions to match a specific 3D printer. This will help you to get an idea of how well your objects will fit onto the print bed of the printer you want to use.
How to Use the Ruler
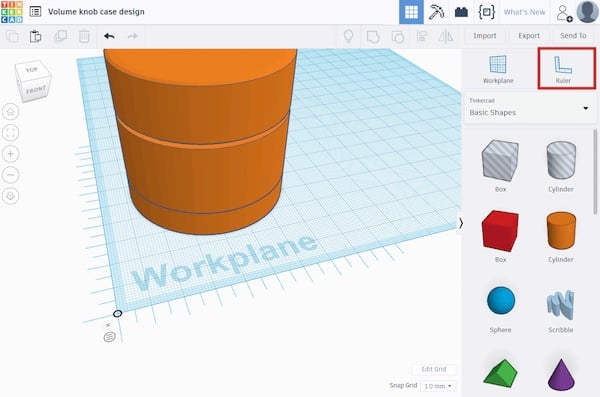
Click the button right next to the “Workplane” button to place a ruler. I recommend placing it in a corner of the main workplane:
Use the ruler to make sure your design is the right size for the project you're building.
You can use the black circle to change the ruler’s orientation. After placing it anywhere on the workplane, click on a shape. The ruler will display the measurements of the selected part and the distance from the ruler to the part:
You can adjust the ruler to the shape you're designing.
This will allow you to quickly and precisely change the size of an object by directly entering the desired length of each side.
How to Define Shapes by Programming
Tinkercad’s built-in programming tool is great for makers, but advanced and more professional users can work with the “Shape generator” to define new shapes. You can access it by clicking this button in the top toolbar:
You can use the shape generator to define new shapes in Tinkercad.
This tool will allow you to use JavaScript to define new shapes. However, this is a very advanced feature and you’ll need a good understanding of matrices and computer-graphics, in general, to get useful results here.
If you'd like to continue learning tips and tricks for utilizing Tinkercad, check out these other tutorials:
All screenshots were taken in Tinkercad.